
Plan the load-bearing design
Use this section to make the Building Ice Impressions decision easier to compare in real life, not just on paper. Start with the reader's actual constraint, then separate must-have requirements from details that are merely nice to have. A practical choice should survive normal use, maintenance, timing, and budget. If a recommendation only works in an ideal situation, call that out plainly and give the reader a fallback path.
The simplest way to use this section is to write down the must-have criteria first, then compare each option against those criteria before weighing nice-to-have features.
Select clear ice and proper tools
Structural integrity in ice sculpting begins with material selection. Cloudy ice contains trapped air bubbles and impurities that act as stress fractures, weakening the sculpture before you even pick up a chisel. For weddings and festivals, where pieces must withstand handling and display for hours, clarity is not just aesthetic—it is structural. Use only clear ice blocks, which are denser and more transparent, allowing you to see internal flaws before cutting.
The quality of your tools directly impacts the finish and longevity of the piece. Dull blades tear the ice, creating micro-fractures that spread under temperature changes. Sharp, high-carbon steel chisels and a dedicated ice chainsaw provide clean cuts that seal naturally. Avoid general-purpose woodworking saws; they lack the tooth pattern needed for frozen water and will gum up instantly.
Invest in a complete kit that includes safety gear. Ice shards are sharp, and the vibration from power tools requires protection. A proper setup ensures you can work efficiently without compromising the ice's structural integrity.
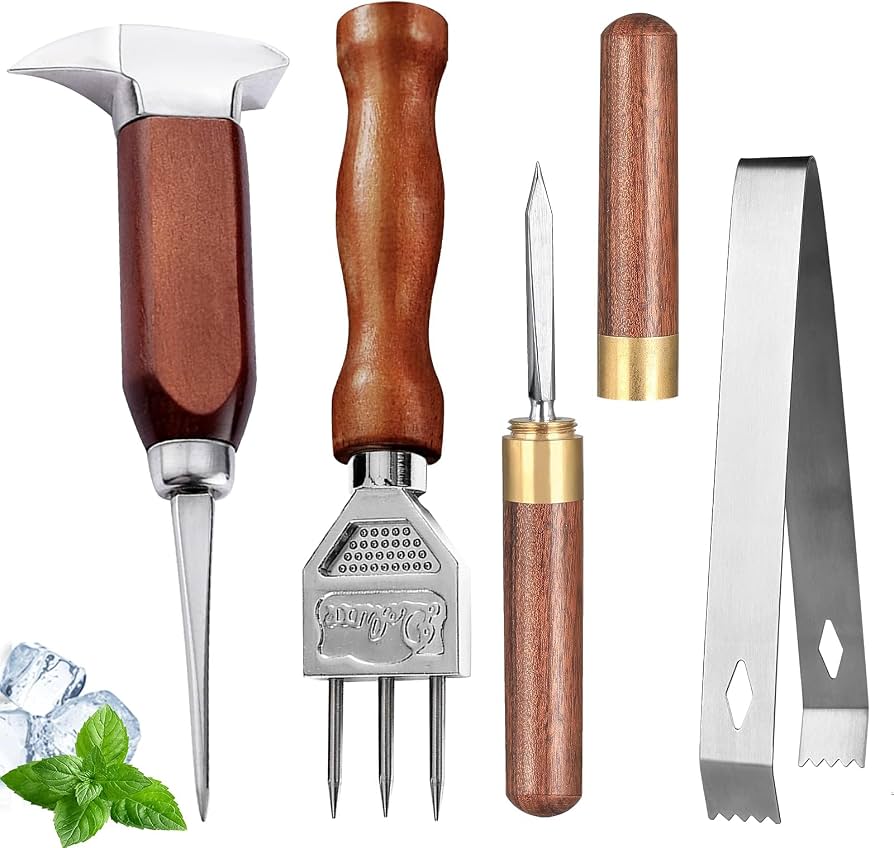


As an Amazon Associate, we may earn from qualifying purchases.
Assemble blocks with water fusion
Water fusion is the process of creating a single, monolithic structure from separate ice blocks. By melting the surfaces where blocks meet and refilling the gap with water, you create a bond as strong as the ice itself. This method eliminates weak joints and ensures the sculpture holds together under its own weight and the stress of temperature changes.
The goal is to make the seams invisible while maximizing structural integrity. Treat each joint like a weld in metalwork: precision and cleanliness matter more than speed.
Before bonding, ensure each block sits perfectly level. Use a spirit level on multiple axes. Even a millimeter of tilt can create uneven pressure points that lead to cracking as the ice settles. Shim the base with thin, waterproof material if necessary, then remove it once the bond is set to avoid trapped moisture.
Smooth ice surfaces repel water, preventing a strong bond. Use a chainsaw, ice saw, or rasp to roughen the contact faces of both blocks. Create a textured, matte finish that allows water to penetrate and freeze into the microscopic pores. Remove all sawdust and debris with a brush or compressed air; any grit left behind will create a weak layer.
Place the blocks together without water and use a heat gun or torch briefly on the contact edges. This melts the very top layer, creating a thin film of water. Immediately press the blocks together firmly. This initial "tack" holds the blocks in position and prevents them from sliding while you fill the deeper gap. Wipe away any excess water that squeezes out.
Once the blocks are tacked, use a spray bottle or small cup to fill the seam with clean water. Avoid pouring large volumes at once, which can wash away the roughened texture. Fill the gap completely, ensuring no air pockets remain. Use a tool to poke the water down into the deepest crevices of the roughened surface.
Cover the joint with a wet cloth or plastic sheet to slow the freezing process. Rapid freezing can cause micro-cracks due to thermal shock. Allow the water to freeze slowly, expanding and locking the two blocks into one piece. For large structures, this curing process may take several hours depending on ambient temperature. Check that the seam is solid before applying any lateral pressure.
Carve with internal support in mind
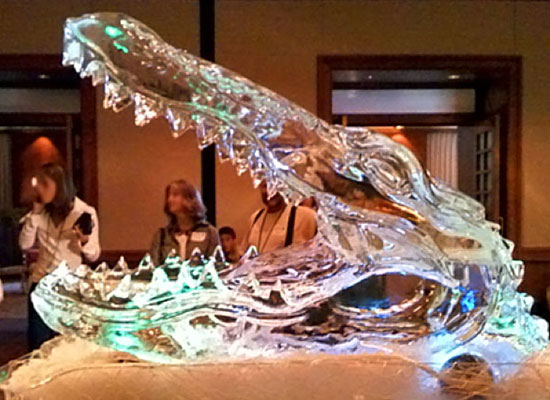
Structural integrity in ice sculpture is less about the final shape and more about the hidden skeleton within. When designing for weddings and festivals, the goal is to create pieces that withstand gravity, temperature fluctuations, and the vibration of a crowded venue. The most common failure point is not the main body of the ice, but the thin, delicate extensions that artists often carve for aesthetic flair. To ensure your sculpture stands firm, you must prioritize load-bearing thickness over decorative thinness.
Start by identifying the critical load points: the base, the main vertical columns, and any junctions where horizontal elements branch out. These areas must remain thick and robust. A good rule of thumb is to keep the primary support columns at least three to four inches thick, depending on the total height of the sculpture. If you are carving a large arch or a cantilevered arm, the internal structure needs to be even thicker to counteract the leverage forces. Think of these support points as the pillars of a building; if they are weak, the entire structure will collapse under its own weight.
Avoid the temptation to over-thin sections during the detailing phase. It is tempting to use rasps and files to create lace-like patterns or slim down the silhouette, but this removes essential material. Instead, focus on creating smooth, continuous curves that distribute weight evenly. Sharp corners and thin spikes are vulnerable to stress fractures, especially when the ice begins to melt slightly due to ambient temperature changes. If you need a delicate look, achieve it through surface texture and lighting rather than by reducing the ice's thickness.
When incorporating complex shapes, such as interlocking rings or suspended elements, consider adding internal supports. This might mean leaving small, uncarved bridges of ice that connect separate parts, or embedding metal rods or wooden dowels for extra stability. These supports should be hidden within the design or painted to match the ice, ensuring they do not detract from the visual appeal. By planning your carving sequence from the inside out, you ensure that every part of your sculpture contributes to its overall strength.
Finish and protect the sculpture
Once the carving is complete, a final smoothing pass with a hot knife or torch removes tool marks and creates a glass-like surface. This step not only improves aesthetics but also seals the outer layer, slowing melt rates during the event. Brush away any loose shavings with a soft bristle brush to keep the piece clean and professional.
Branding with ice stamps
For weddings and corporate festivals, branding adds a personalized touch. Use food-safe metal ice stamps to emboss logos, monograms, or dates directly onto the sculpture. Press the stamp firmly into the ice for a few seconds, then lift straight up to avoid dragging. This technique works best on smooth, flat surfaces or large, stable blocks.
Protective measures
To ensure the sculpture lasts through the event, apply a thin layer of food-safe sealant or use a commercial ice preservative spray. These products create an invisible barrier that reduces evaporation and melting. Place the sculpture away from direct sunlight and heat sources, and consider using a misting system if the event is outdoors in warm weather.
Pre-event checklist
- Inspect for cracks or weak spots
- Ensure branding is crisp and centered
- Verify sealant application is even
- Check temperature and humidity levels
- Confirm display stand is level and stable
Common structural failures and fixes
Even well-planned ice sculptures can fail under the physical demands of large-scale event displays. The most frequent issues stem from poor fusion between blocks and insufficient support for heavy loads. Addressing these problems requires a systematic approach to joining and reinforcing the ice.
Poor fusion between blocks
When blocks are not properly fused, weak joints form at the seams. These joints are the first places to crack under stress or temperature fluctuations. To fix this, ensure all contact surfaces are fresh and free of debris. Use a heat gun or hot water to melt the surfaces slightly, then press the blocks together firmly. This creates a monolithic bond that is nearly as strong as the original ice.
Thin or inadequate supports
Thin supports often buckle under the weight of upper sections or decorative elements. This is especially common in tall sculptures or those with wide bases. To prevent this, calculate the load-bearing capacity of each support. Use thicker blocks or add internal reinforcement with metal rods or additional ice pillars. Always distribute weight evenly across the base to avoid point loading.
No comments yet. Be the first to share your thoughts!